"Things won are done,
Joy's Soul lies in the Doing."
- William Shakespeare

Thursday, September 1, 2011

Withdrawals

Last night, when there was a spare second to notice, I found myself in a bit of a funk.  Little grumpy.  Little irritable.  Itchy fingers.  What could be going on?  Ah...knitting withdrawals.

Yup, I'm that nerdy.

I recently finished up a few gifts.  Because the cold may not be here yet (please, not yet!), but it's a-comin'.

This one for the Mister...


Handsome, right?  The Mister's not so bad, either.

That is the Turn A Square hat, by Jared Flood.  And it is damned cool.  My Ravelry notes are here.  Pretty easy-peasy, except for the fact that I used double points, instead of a circular needle, for the whole hat.  Which makes it a little slower going for little old me.  What are you gonna do?  I had a birthday coming up, a hat that called for knitting, and there you go.  Learned some new tricks too, with carrying the yarn up the inside, for stripes, and using the jogless jog technique.  Sweet.

And then this baby:


That's the Flower Bud Beanie, Ravelry notes here.  Made it in a charcoal grey bamboo blend, so it's not overly flowery, but still sweet and girly.  And I am so making one for myself.  Soon.

And yes.  Further proof that I'm a total nerd...


And also not the most talented photographer...

Wee booties for Brennan.  Oh.  My.  Word.   I cannot help my dorky tendencies.  And I am oh-too-grateful for dear friends that tolerate them.  (And a friend who may even put these little numbers on her sweet little pixie of a bub.)  Notes here...yada, yada, yada...should you feel so inclined to shout out to the world:  "I'm rather nerdy...making some booties here...but holy moses, they're cute!"  Shout it out, people.

So...three projects finished.  And some itchy fingers.  And a seriously busy week, back-to-school-style, with no time for knitting...

Yet.

I've got a few projects up my sleeves though.  Never fear.

Won't be itching and twitching through the withdrawals for long.


Tuesday, August 30, 2011

Out of the Box, Take 5

I do try not to beat a dead horse...I mean, I'm really not into that sort of thing.  But, here we go.  Let the beating begin.

Kidding.  There will be no beatings.  But I am about to share yet another recipe, from yet another French (ish) cookbook.  (There's your horse.)


Vegetable Tian, from Barefoot in Paris, by Ina Garten.  I have a whole heap of Barefoot cookbooks, but find myself, at least these days, not consulting them very often.  Perhaps it's the excessive use of butter and olive oil...and you know I love my butter and olive oil, so that's saying something.  Perhaps it's the somewhat unobtainable ingredients.  I live in the way-out-there part of the Pacific Northwest.  Even Seattle is far for me, most of the time.  Perhaps I have an inferiority complex...look, I am nowhere near Montauk's fancy pants food shops.  Or Provence, or Sagaponack...wherever that is. Trader Joe's is generally about as fancy as it gets in these parts.  So we make do.

I do like this cookbook.  Many of the recipes are fairly standard ones, which you'll find in a lot of other French-style cookbooks.  Some are a bit fiddly for me, and some are just perfectly lovely.  Like the Vegetable Tian.

Super easy to prepare, especially with our summer bounty from our CSA box.  A bit of slicing, a bit of layering, drizzle of olive oil and cheese...and Bob's your uncle.  (I had to drop that one.  Look it up.  I love weird slang.)  As usual, I altered the recipe, but only minutely this time.  It calls for Gruyere.  I had none.  But I did have a tasty Toscano peppered cheese from Trader Joe's, which works as a wonderful substitute for parmesan or gruyere, and is also great to nibble from a cheese platter.  Also, I ignored Ina's advice to have all my vegetables be of uniform size, because they weren't.  And I simply wasn't up to a perfection mission.  Perhaps the next time the queen comes to tea, I'll make certain everything is just so...but for the Mister, the kiddos, and myself, it'll do.

There is a somewhat lengthy cooking time attached to this recipe, but because it's so quick to assemble, you can get it ready and pop it in the oven and pretty much get on with other things, until it's ready.  I think it would work perfectly fine to assemble it earlier in the day, but just stop short of seasoning (so the veg doesn't go watery), pop it in the fridge, and bake later that day.

Despite the long cooking time, the vegetables are in no way soggy, and the cheesy top goes all crispy and browned...oh yum.  You really must eat this.


Vegetable Tian - adapted from Barefoot in Paris
-serves 6, as a side

Ingredients
olive oil
2 large onions, cut in half and sliced
2 large garlic cloves, minced
1 pound medium potatoes, unpeeled (red, yellow, or white, not Russet)
3/4 pound summer squash (I used half yellow crookneck, and half zucchini)
1 1/4 pounds tomatoes
1 tsp sea salt
freshly ground black pepper, to taste
1 Tbs fresh thyme leaves, plus extra sprigs
2 oz Gruyere cheese, or Toscano, or a cheese of your choice

Preheat the oven to 375 degrees F.  Brush a 9x13x2 inch baking dish with olive oil.  

In a medium pan, heat 2 Tbs olive oil and cook the onions over medium low heat, for 8 to 10 minutes, until translucent.  Add the garlic and cook for another minute.  Spread the onion mixture on the bottom of the baking dish.

Slice the potatoes, summer squash, and tomatoes in 1/4 inch thick slices.  Layer them alternately atop the onions, in a spiral pattern, beginning on the outside of the dish, working your way in.  They ought to fit tightly, making only one layer, so each vegetable will have a lovely crispy top.  Sprinkle with salt, pepper, thyme leaves and sprigs, and drizzle with 1 Tbs olive oil.  Cover with aluminum foil and bake for 40 minutes, or until the potatoes are fork-tender.  Remove the foil and thyme sprigs, sprinkle the cheese over the top, and bake for another half hour, or until browned.  Serve warm.


We served our Tian alongside polenta.  Scrumptious.

Sunday, August 28, 2011

One More Thing

As summer draws to its inevitable close, and the first day of school approaches, we've been jam-packing each and every day with One More Thing.  One more birthday party, one more trip to the coast, one more float down the river, one more day at the lake, one more day spent celebrating this, the Season of all Seasons.  (At least in this gal's humble opinion.)


We're not much different, really, than animals busy preparing for winter.  As they're stockpiling food, we're stockpiling all the warm, sunny day memories, to buoy us through the cooler (cold) days ahead, spent more often indoors than out.  Hard, in these lovely days, to wrap our heads around the fact that it's almost over, for this year...


But, there are always new adventures to look forward to, with the change in the seasons...

(The kiddos are rather giddy about returning to school.)

Alright, down to business though.  I did have a point to this post, aside from nostalgic ramblings...that is, a recipe, of course!  We just celebrated the Mister's birthday, and he requested a chocolate cheesecake.  The very same chocolate cheesecake that he made last year, for my birthday.  From my well-loved, and oft-used cookbook, My French Kitchen, by Joanne Harris and Fran Warde.  

This is not a cheesecake in the usual American sense.  Not a lick of cheese in there, you see.  Instead, it's rather similar to a mousse, on a cookie crust.  It's a duo of white and bittersweet chocolate, made of creme fraiche and cream, with the loveliest background hints of cinnamon and kahlua.  Undeniably rich, but with more of a lightness than the typical cheesecake.  How could you possibly go wrong there?

You can't.


Okay, little disclaimer.  One, I've not photographed the entire cheesecake, because I just couldn't.  We had some very ready for dessert folks, and I didn't want to risk losing a finger due to a cake emergency.  This is all I could manage.  Two, I did not successfully marble my white and dark chocolate.  I believe I finished that cake well past my bedtime, and got a little sloppy, what with all the yawning, and distracting longing for my bed.  It doesn't matter though, it tasted delicious, even if it wasn't quite as pretty as it's meant to be.

Here's the recipe:

Chocolate Cheesecake - adapted from My French Kitchen
- makes one 8 inch cake, using a springform pan

Ingredients
1 1/2 cups (7 oz) finely crushed chocolate chip cookies (I used my food processor to crush a crisp, dry cookie, from Trader Joe's)
6 Tbs (3/4 stick) unsalted butter, melted
1/2 tsp ground cinnamon
3 1/2 oz bittersweet (70% cocoa) chocolate
8 oz creme fraiche
1/3 cup light brown sugar, packed
3/4 cup, plus 2 Tbs, heavy cream
1 Tbs coffee liquor, such as Kahlua
3 1/2 oz white chocolate, grated
1 tsp pure vanilla extract

Mix the crushed cookies with the melted butter and cinnamon, and press into a lightly buttered (base and sides), 8-inch springform pan.  If you're unwilling to trust your pan's non-stick-ness, cut a circle of parchment to fit on the buttered bottom, and press the the cookie crust onto that.

Chop the bittersweet chocolate and melt in a heatproof bowl over a pan of gently simmering water.  (I use my old-school pyrex bowls for this.)  Remove from the heat when there are a few last bits of chocolate not quite melted, and stir until they melt away.  Cool until tepid.

Beat together the creme fraiche and brown sugar until blended, then add the heavy cream and mix just until smooth.  Do not beat until it forms stiff peaks, the mixture will thicken with chilling.  Divide the mixture evenly between two bowls.  Gently fold in the melted chocolate and kahlua into one, and the grated chocolate and vanilla into the other.

Spoon dollops of the two mixtures onto the cookie crust and lightly mix with a fork to create a marbled affect.  (Or attempt this, but due to sleep deprivation, you too may struggle.  Don't judge, it'll still taste fabulous.)  Chill for 3 hours before serving.

I grated some white and dark chocolate over the top, to garnish.  Okay, I admit it.  I did it in a pathetic attempt to hide the marbling failure.  But it's damn tasty.  So go for it.

The Mister gave it a Cheeky Thumb's Up.


Such a goof.  
(Grin.)

Tuesday, August 23, 2011

Ten Years In

On this day, ten years ago...the Mister and I were in Gibraltar.


Getting Married.

I didn't realize until about a year ago, that driving to Gibraltar, from our village in Portugal, grabbing a couple of tourist scuba divers to act as our witnesses, and tying the knot in a registrar's office...sort of qualifies as an elopement.  Which is entirely hilarious to me.  I suppose because, why not?  We haven't exactly followed standard protocol since we met, and things are working out beautifully...so hey, I'll go with it.  It's good to have a story to tell anyway, wouldn't you say?

We actually did our legal ceremony in Gibraltar because it was far too large a headache to work it out in Portugal, and the Mister is English, and Gibraltar was just a hop, skip, and a jump away from our Algarvian home.  Or rather, several hours' drive in Nessie, our non-air-conditioned little motor...through temperatures that reached, I believe, 114 degrees F at one point in Spain.  Ahhhh...the memories.

We celebrated with a sailboat ceremony back in Portugal, in the grottoes outside Lagos, a few weeks later.


And in the past ten years, we've had a more than a few adventures...

...we've lived in four countries...
...gone through immigration three times...
...lived in nine houses (nine?!  how is this even possible?!)
...brought two kiddos into our world, and theirs...
...bought a major, and I mean major, fixer upper of a house...
...fixed up that crazy house and created a home...
...owned eight cars in four countries, most of which we named, for good luck...
...and amongst all of the ins and outs, ups and downs, and adventures of Life...
We've done a whole lot of laughing, and enjoying ourselves.

Together.


Which is the best part, really.

Happy Ten Years, Mister. 

Monday, August 22, 2011

Breaking the Fast

I love that the meaning of the word Breakfast is one of those oh-so-literal meanings:  Breaking the Fast.  I also love that it sounds like I've been spending my sleep time in a truly sacrosanct activity,  while in reality, I've been snoozing away, possibly drooling contentedly on my pillow.  Dreaming for a Cause?  I'll take it.  It makes breakfast taste that much better.

I found this recipe for Petite Crustless Quiches on French Revolution.  A truly marvelous food site.  Go visit.  The food is unequivocally gorgeous.  And French.  Mais oui.

Going with my usual fudge-a-recipe-with-what-I've-got bit, I did just that.  Fudged it, and used what I had in the fridge.  I imagine you could adapt these delightfully easy-to-make mini quiches in so many ways.  Changing the herbs and cheese, as I did...adding bacon, or tiny diced veggies...the possibilities are positively endless.  Go play with your food.


Petite Crustless Quiches - adapted from the French Revolution recipe
-makes 12 mini quiches

Ingredients
8 eggs
1/2 cup whole milk
3-4 Tbs fresh herbs, I used basil,chives, and parsley
1/4 cup feta
sea salt and freshly ground pepper

Preheat the oven to 375 degrees F, and lightly oil a 12 cup muffin pan.

Whisk the eggs and milk together, and season with salt and pepper.  Mix in the herbs.  Divide the mixture evenly between the muffin cups, and top each with a bit of crumbled feta.

Bake for 20-22 minutes, until the quiches appear firm, puffed, and lightly golden brown.  Allow to rest in the pan for 5 minutes, before loosening with a knife.  Serve hot or at room temperature.


Bon petit déjeuner!

Sunday, August 21, 2011

Better with a Crowd

Why, hello again.  I've just returned from a lovely, sunshine-filled visit with my rather prolific family...the kiddos, my mom, aunt, uncle, cousins, and all their many (awesome) children.  It appears that I have (at long last) returned to summer weather here in the ole' Pacific Northwest.  Just in time for school to start back up.  Hm.  I guess I'll take what I can get, and be thankful that life is, if nothing else, very green here.

We all had a great time, chock full of swimming, cooking, eating, and good deal of reminiscing over when we (the cousins and I) were the kids, and the now-grandparents were the sometimes harried, always busy parents.  Who may, or may not, have resorted to the occasional drastic measure in order to cope with a riotous posse of littlies.  These drastic measures may, or may not, have included such classics as:

...a very public, very frigid, very naked hose-down after four little boys decided to bathe in the mud...

...ditching seven children (while keeping us in their sight, of course) at the shore of Lake Gogebic, while paddling off in a canoe and waving THE secret chocolate stash over their heads and cackling maniacally...

...advising (and teaching) a disconsolate four year old to punch a bully, and rewarding him hugely when he did...

I could go on with the flashbacks...but I think that'll do for today.  Suffice it to say, our mother's and aunt's ever-loving, but occasionally off-the-cuff parenting techniques offer a bit of inspiration to those of us cuzzies who are herding around our own flocks today, as well as consolation for when we catch ourselves pulling a less-than-kosher parenting move.  Hey, being a mother is all about working with what you've got, staying in the moment, and generally flying by the seat of your pants a bit.  And usually, hopefully, you get a funny story at the end of the day.  A story for which our kids won't seek therapy.

It's pretty powerful stuff watching our little people create friendships with each other, on their yearly visits, just as we cuzzies did at their age.

In amidst the laughter, sunshine, and swimming:


...we, of course, had to eat!

Poolside Pizza.  Thirteen pizzas, to be precise.  That tells you that not only do we love some pizza, and that there is a fairly large crew to feed...but that this is an easy peasy recipe.  Simple as pie, you might say.

Since pizza (and family) is all about throwing together what you've got on hand, I'm not giving you a topping recipe.  Just do what you like.  It's virtually impossible to make a bad pizza, if you've got good dough.

We barbecued our pizza, which is my favorite way of preparing it.  I have a super handy barbecue pizza pan, which you can pick up at most good cooking stores, or online.  If you choose to bake it in the oven, go with 450 deg F, until the top is bubbly, and the crust is golden brown.


Poolside Pizza - adapted from Simple Italian Snacks
- makes 3, ten-inch, thin crust pizzas (my preference), or 2 thick crust pizzas

Ingredients
2 1/4 tsp active dry yeast
2 cups lukewarm water
1 Tbs fine sea salt
1/4 cup extra-virgin olive oil
4 1/4 cups all-purpose flour

*Note*  I made all of the dough in the bread machine, but the original recipe uses a stand mixer.  I can only vouch for the bread machine method, but I'm including both directions.

Bread Machine Directions
To the bread machine pan, add the water, olive oil, salt, and yeast, give it a quick mix, and leave to stand for 5 minutes.

Add the flour, set the bread machine to the Dough setting, and go hang out by the pool.

Standing Mixer Directions
Add the water, olive oil, salt and yeast to the bowl of your stand mixer, stir to combine, and leave to stand for 5 minutes.

Using the paddle attachment, slowly add half the flour to the yeast mixture.  When well combined, add the remaining flour.  Set the mixer to medium, and refit with a dough hook, then continue mixing until the dough comes together in a smooth ball.  Mix for 2 more minutes, until soft and pliable.  Turn onto a lightly floured board, and knead gently for a few minutes.

Shape the dough into a ball and place in a lightly oiled bowl.  Cover the bowl with plastic or a damp tea towel, and leave to rise for 30-40 minutes.

Go hang out by the pool.

Rolling and Barbecuing
Preheat the barbecue to 450 deg F, if you have a temperature gauge, about medium high.  When it reaches temperature, turn one side down to low, and keep one at medium to medium high, while maintaining the 450 degrees.


When risen, divide the dough into two or three balls, then roll or stretch into desired size.  Place the prepared dough on your pizza pan, top with sauce and toppings, and place on the hotter side of the barbecue.  Cook, checking often, until the bottom crust begins to turn golden brown, and is baked and sturdy enough to be removed from the pizza pan, but not cooked all the way through.  This usually takes about 5 to 10 minutes.


Keep an eye on those topping thieves!


Now slide the half-cooked pizza onto the cooler side of the barbecue, and use the pizza pan to start another pizza!  Continue on until the troops are satiated.


Now go hang by the pool.  And have a margarita, and a laugh with friends or family, while you're at it.  Life, like pizza, is always better with a crowd.


Monday, August 15, 2011

Off the Needles


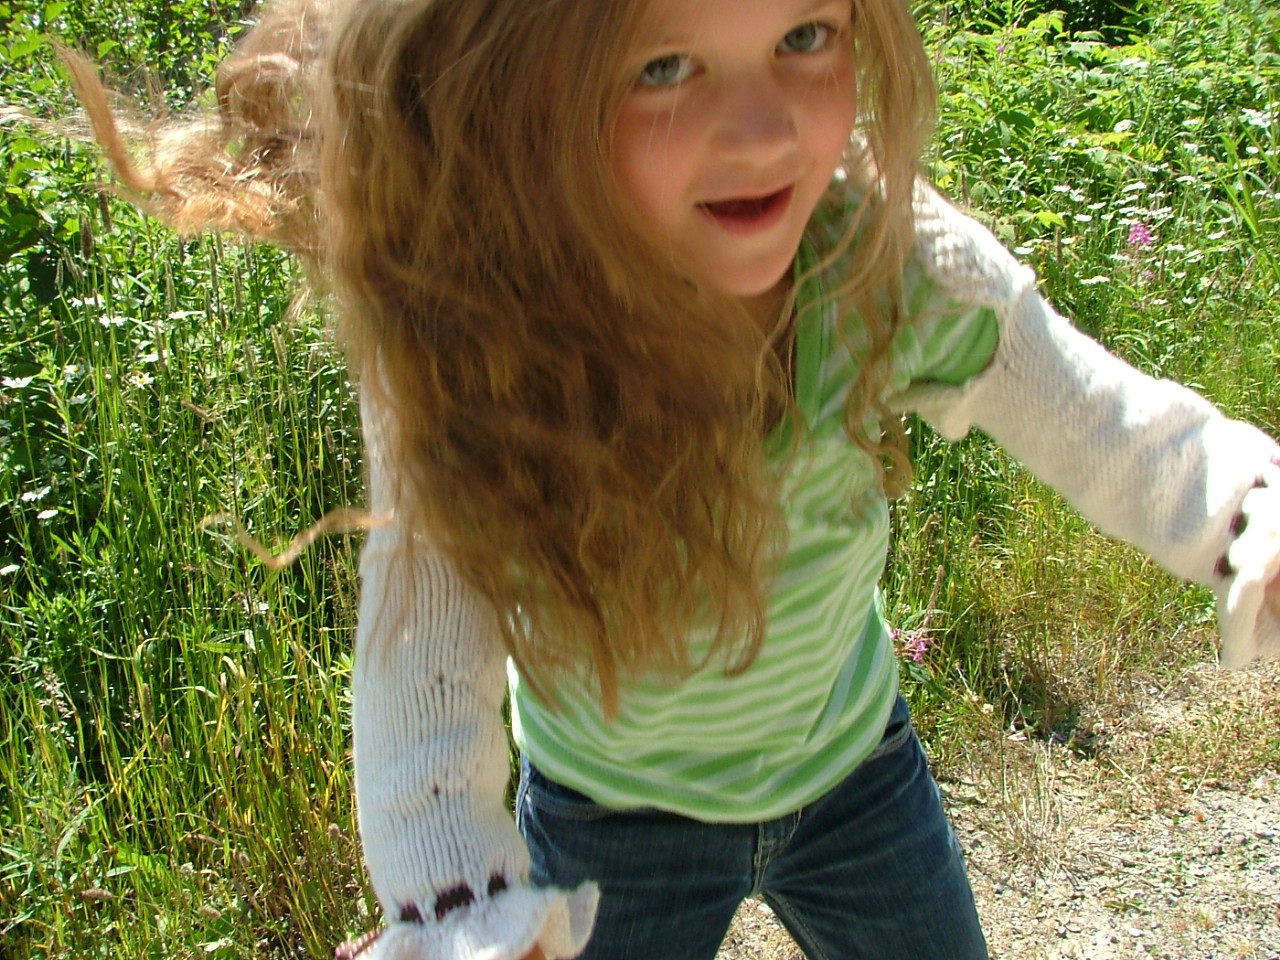
Haha!  I so love when I get a project completed - especially when I receive a gift card for the yarn shop for my birthday...and kind of want perhaps, maybe, oh gee, to make something for myself.  I almost feel like I shouldn't be bragging (or blogging) this one, because it was so super simple...so simple, in fact, that I said to the Mister that I needed a more challenging project next time. 

Anyway, it's called the Seesaw Shrug.  My Ravelry notes here.  I love it, the girl loves it, we're all good.


It's a dancy sort of sweater...perfect for a jaunt on a somewhat sunny day.  Or a spin through the flowers.


As you do.


Whoa...got a little dizzy there.

I'm off to visit the cuzzies for a few days...see you soon!