"Things won are done,
Joy's Soul lies in the Doing."
- William Shakespeare

Monday, March 26, 2012

Redefined

There have been quite a few changes happening around these parts, of late.  Adjusting our lives to fit a new, albeit temporary, space is the name of the game right now.  When I was packing up the house, prior to the move, my mission was to figure out which bits and pieces of our lives were necessary, and would be unpacked to use, and which could be boxed up until a permanent move was made.  We're renting a lovely place until we find the right home to buy, so to avoid extra packing/unpacking work, I'm limiting our unpacked stuff to only what is necessary.  This is tricky to define, though.  Exactly how many ramekins does one need for everyday use?  (I decided eight was good.  And that ice cream dishes were not necessary, though it rather pained me to pack them up, for you just never know when you may need a pretty ice cream dish, do you now?)  Cookbooks...that was tough, let me tell you.  But I powered through, and was very strict with myself, only keeping out what I use most, these days.  And here they are, looking somewhat lonely without all their friends:


Six.   A mere six cookbooks.  Thank goodness for the internet and the library, right?  I'm pretty sure I'll pull through, and that we'll be continue to be well fed.

It's not been all self-imposed limitations, I am happy to report.  With the move, came a largely increased space, and I was finally, after five and a half years, able to resume life with a proper sized dining table.   A table that comfortably accommodates a decent sized group, and allows for serving meals family-style, once again.  Rather than the cook (that would generally be me) serving it up in the kitchen, restaurant-style.  (Although I don't allow substitutions or special requests.)  Oh, how I missed this table, and how very much I'm enjoying our mealtimes these days.


In the spirit of redefining odds and ends, I have an old recipe to share, that I tweaked a bit, updated a little, and made a bit more my own.  This recipe is one which appears at least once a year, at family gatherings, and I can honestly say I don't remember a time that Mom's Rice Salad wasn't a part of my growing-up food history.  It's not to say that the salad needed to be altered, but just that I wanted to see if I could put a spin on it, modernize it a little.  I kept quite true to the original ingredients, because I love the way all the vegetables complement each other.  The salty green olives perfectly contrast with crunchy green peppers, which in turn set off the creamy artichoke hearts.  A minor adjustment here and there, the old white rice replaced with Israeli couscous...the dressing lightened just a bit...and the end result...pretty tasty, if I may say so.  This is a great salad to make for a barbecue, and it keeps well for several days, in the fridge.

An old favorite, redefined.


Israeli Couscous Salad with Green Veggies
- serves  8 to 10, as a side

Ingredients
1 1/2 cups Israeli couscous
zest of half a lemon
juice of one lemon
2 Tbs extra virgin olive oil, or 2 Tbs artichoke heart marinade
1 Tbs green olive brine
1/4 cup mayonnaise
1 green pepper, seeded and chopped
3 or 4 green onions, chopped
1 cup marinated artichoke hearts, chopped
1/3 cup green olives (the kind with pimentos), sliced
sea salt and freshly ground black pepper, to taste
1/4 cup fresh parsley, chopped

Put a medium pot of salted water on to boil, and while you're waiting for it, prepare your vegetables.

Cook the couscous until al dente.  Because it will soften further as it cools, and also absorbs some dressing, we don't want to cook it as long as the package suggests.  Mine took about 7 or 8 minutes, to be tender on the exterior, but with a bit of a bite on the inside.

While the couscous is still hot, pour the lemon zest, half the lemon juice, artichoke marinade (or olive oil), and olive brine over the couscous, and season with pepper.  Hold off on the salt because the olives and brine add quite a bit of salt to the salad.  Leave to come to room temperature, about half an hour.

Once the couscous has cooled, add the mayonnaise, and the remaining lemon juice.  Add in the vegetables and parsley, and gently stir to combine.  Check for seasoning, and chill for an hour before serving.  (Can be made a day ahead.)


This one's best eaten with a group of friends, or family, I think.  Enjoy!

Wednesday, March 21, 2012

Making Time

Again, with the silence on this little blog.  I can now happily say that those things that have recently stood in my blogging-way...packing, moving house, waiting for internet to be hooked up...those things have been dealt with, and I'm back with some food for you.

It's been a bit of a challenge these days, making time for a homemade meal, I must say.  Lacking the time, the kitchen tools awaiting unpacking, and the energy, it's been kind of slapdash eating around here.  Night before last though, I got it together, enough to make a simple sort of supper, inspired by Nigel Slater's Tender.  May I interject here, and say that this book is divine.  I'm quite sure I've said it already, but seriously folks, divine.  Especially for all you gardeners out there.  Which I aspire to be.  And eaters of good food.  Which I definitely like to think I am.

Anyway, a cold night called for a warming supper, and as I flipped through the beautiful pages of the book, looking for a recipe for ingredients that were present in my kitchen, I felt myself drawn to the Potato section.  (Mr. Slater divides his book into gardening and recipes for individual vegetables, it's genius, I tell you.)  I dig a potato.  No pun intended.  Especially as I have not yet ever actually dug a potato.  But I love them, in all their humble, transmutable glory.  And as I had just unearthed my potato ricer from the mountain of kitchen boxes, I knew a nice mash was just the thing for this sort of evening.


In Tender, Slater often simply gives a hint at a recipe.  A gist, if you will.  Suggesting a few ingredients that marry well, and leaving the amounts up to the cook.  I love this.  It works so well, given that you may be feeding only a few, or many.  Given that you may have a certain kind of cheese, but not another.  And especially given that some foods are just so flexible, and it's a good thing to get creative in the kitchen, really, isn't it?

Let's do this thing.


Leek and Gruyere Mash - adapted from Tender
-serves 4 as a main, 6 as a side

Ingredients - I'm giving you rough amounts here, use whatever you've got, you really can't go wrong

About 1 1/2 to 2 lbs of russet potatoes, peeled and boiled in salted water until fork-tender
Milk or cream and a large nob of butter, for the mash
One or two large leeks, rinsed well, and sliced into rounds
Butter for sweating the leeks
Gruyére, grated, about 1/2 to 3/4 a cup
A bit more butter, for dotting on the top of the mash before baking, about a Tbs

While your potatoes are boiling, sweat off the leeks in about a tablespoon of butter, in a saucepan, over rather low heat.  Season, and cover with a lid, so they cook nice and slow.  Stir from time to time, cooking until they're silken, and practically falling apart.  No browning here, so keep the heat nice and low.  Once they're done, spread in the bottom of a baking dish.

Once your potatoes are just fork-tender, drain them and using a potato ricer (my favorite way to make a mash), rice them back into the cooking pot.  Or place them in the pot, and mash them.  Throw in some butter, a tablespoon or two, season with sea salt and pepper, and enough milk or cream to bring your mash together nicely.  I used a mixture of milk and cream, since I had some cream that needed finishing, and well, cream is darn tasty.  Add a bit at a time, don't make your mash too wet and gloppy, you want it to still be nice and thick, but smooth.  Spread the mash over the leeks, taking care not to press down tightly.

Dot the bits of remaining butter over the mash, then cover with the grated cheese, and bake in a 400 deg F oven, until the cheese begins to bubble and the top has touches of golden-brown going on.  This took me about half an hour.  Just keep an eye on it, and you'll be good to go.

And there you have it.  An incredibly simple, and hugely satisfying dish.  One you can easily make time for in a busy schedule.  Serve it up with a salad, or some steamed veggies.  As you can see...


...it went down a treat.  The Girl came back for thirds, after being excused from the table.  Thirds.  It's that good.

Have a lovely day!

Tuesday, March 13, 2012

Of the Porcine Variety

Well, not quite immediately after the weekend, as promised, but here I am with that incredibly tasty recipe for you, a recipe of the porcine variety.

Until fairly recently in my culinary experience, I was not an appreciator of pork.  Now, however, I have awoken to its many charms; its simplicity to prepare, its intense flavor, its relatively low cost...pig is the goods, I have to say.  Especially on tacos, in the form of carnitas.


We had a little shindig at ours on Saturday, a Final Hurrah with some close friends, before the impending move.  In honor of a little informal, but established tradition of throwing together last minute Mexican dinners with our best mates and neighbors, M & J, and because it's so very simple in a busy time, we went for some Tex-Mex style fiesta food.  This unabashedly delectable, and shamefully easy, recipe comes at you from The Homesick Texan, by Lisa Fain, and it, my good people, is one to include in your repertoire.  After a long, slow cook over low heat, the pork is positively luscious, with a deep, intensely nuanced flavor that defies the short list of ingredients.  Your friends and family will love you for this one, mark my words.

Here you go:

Carnitas - Adapted from The Homesick Texan
-serves 4 to 6, with pretty large portions*

Ingredients
3 lbs boneless pork shoulder, cut into roughly 2 inch cubes (do not remove the fat, this is what makes the carnitas so sinfully succulent)
1/2 cup orange juice
1/4 cup freshly squeezed lime juice
4 cloves garlic, bashed and peeled, but left whole
1 tsp ground cumin
1 tsp sea salt

*Note*  I actually used 4 1/2 lbs of pork, and multiplied the other ingredients by 1.5, accordingly.  With 10 adults and 4 kids, plus shrimp tacos, we had quite a bit left over.  And not because it wasn't good!*

Place the pork in a large Dutch oven, or pot, add the juices, garlic cloves, cumin, salt, and enough water to just barely cover the meat.  It's alright if some pieces are not submerged, don't worry.  Bring the pot to a boil, and then turn the heat down to keep it at a simmer, uncovered, for 2 hours.  Here's the best part:  Don't touch the meat.  No stirring.  No pushing pieces under the liquid.  No fuss.  No muss.  Leave it be, as tempting as it is to give it a stir from time to time...you don't need to.  You can set the timer, and get on with something else for the next two hours.  Like packing, if you're me.

After 2 hours, turn the heat up to medium-high, and while occasionally stirring, continue to cook uncovered for about 45 minutes or so, until all the liquid has cooked out and the pork fat has rendered.  During this time, your pot will be somewhere between a hefty simmer, and a full-on rolling boil.

When pork has browned on both sides, it's ready to go.  Check for seasoning, and add salt, if necessary.  It probably won't be, just so you know.

We served our carnitas up on some homemade corn tortillas, with roasted tomatillo salsa, a chipotle-lime sour cream (recipe follows), and some of J's delightful coleslaw.


Chipotle-Lime Sour Cream

Ingredients
1/2 cup sour cream
juice of 1/2 a lime
1 to 2 tsp chipotle hot sauce (I used Bufalo), depending on how spicy and smoky you like it

Mix it up, and you're good to go.  Serve atop tacos, or as a dip paired with other salsas.  Yum.

Have a good one, my friends!

Friday, March 9, 2012

Tidbits

I haven't forgotten this space, nor have I forgotten you fine people.  It's just been a tad bit difficult to find the time, and the quiet, and the peace of mind, to sit down and write for a while.  With 8 days remaining until the move, life is taking on a slightly frenzied pace.  Nothing too extreme, just busier than I prefer it to be.

So, saying that, while I look around the room at all the boxes waiting to be filled with the bits and pieces of our lives, I will allow myself a moment, a wee break from the life-size tetris game that my days have become. (Oh dear, I am a nerd.)  Anyway, they're neither exciting, nor unexpected, but here are some tidbits of what's been going on around these parts:

...boxes, boxes, and more boxes...duh.


It does look like we know how to throw a serious party.  We do.  But not quite to this extent.  Free liquor store boxes.  I can now proudly claim to be buddies with the liquor store guy.

...clearing out the nearly empties, from fridge and pantry...

...today, in the form of Mim's world famous tomato relish sammies...


...and a new twist on my granola recipe, adding unsweetened coconut...yum...

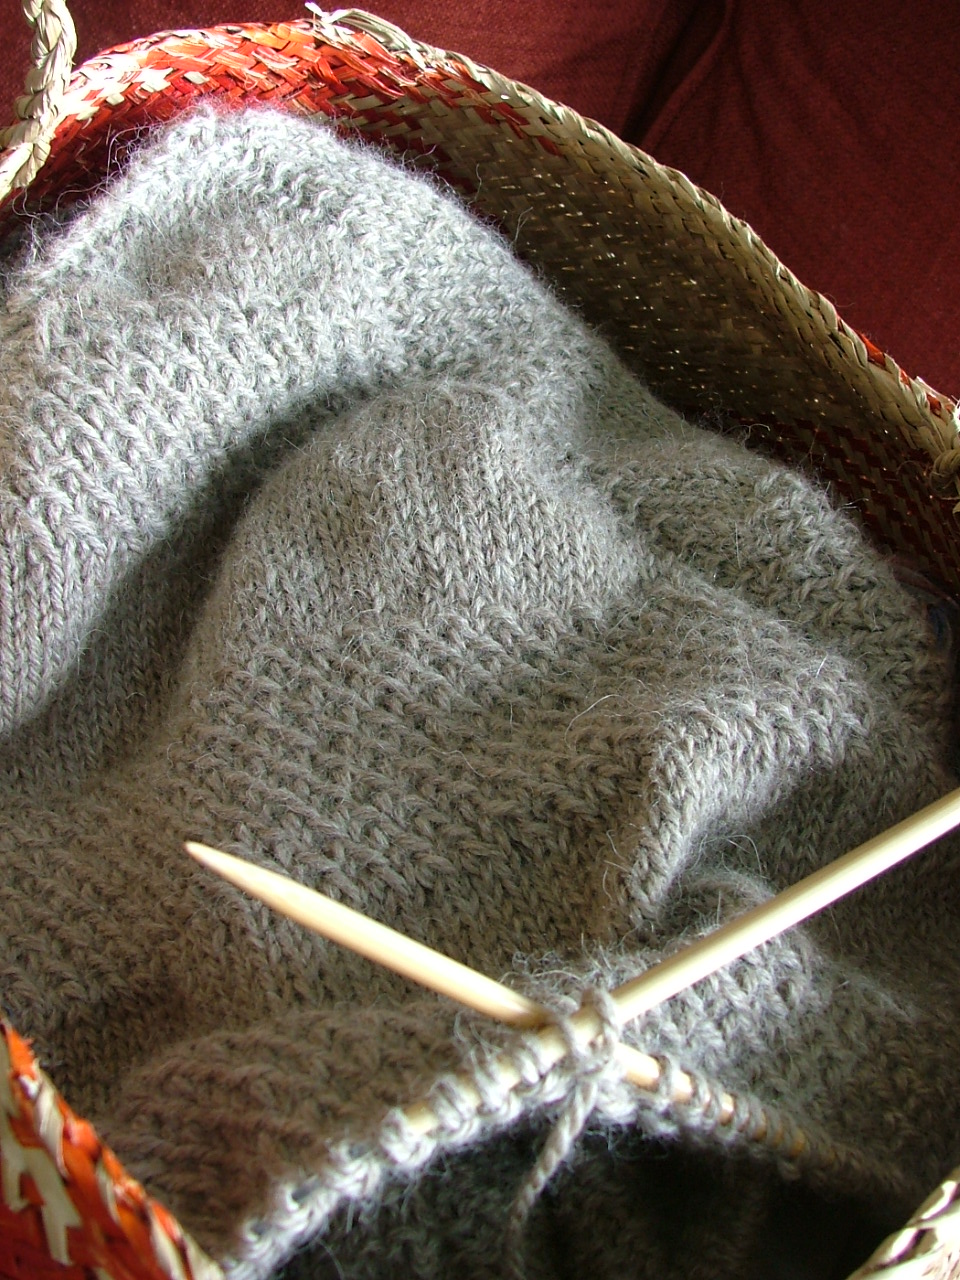
...not quite finding the time to knit a few rows here and there on the textured shawl I'm working on, but at least squeezing in half a row, here and there.  Until I glance around at all the boxes demanding my attention instead.  Boo.


...synchronistically finding the perfect moment to collect sea water for the Boy's science project, while on a house-hunting mission...


...and finally, after yet another day of unsuccessful house-hunting mission-ing... (I swear by all that is holy, I will lose my freaking cool, if I have to look at another farmhouse with an entire floor of gross wood paneling.  Lose it, I tell you!) 
...a gorgeous, sunshiny ferry ride, which kind of made the disappointing house hunt seem not so bad.


All in all, we're managing quite nicely.


Apart from all those bloody boxes, that is.


I'll be back after the weekend with a recipe for you...and believe you me, it's a goody!  Have a beautiful weekend, friends!


Thursday, March 1, 2012

Simplest Bread Machine Recipe Ever

Okay...the title may not be entirely correct.  But I couldn't possibly fit:  "Simplest Bread Machine Recipe for Pain Ordinaire that Tastes Like it's Bakery-Bought.  Ever."  Could I, now?

Now that we've got that out of the way, I'm going to get straight to the point.  That is, I am deeply dependent on my bread machine.  Never for baking though.  I can't stand the loaf shape and texture when it bakes in that odd rectangle pan.  I use it for its muscle, and so I don't have to spend time and energy kneading.  Just pop the ingredients in the pan, set it on the dough cycle, and leave it, until it's time to shape and bake the loaves.  Couldn't be simpler.

And the small amount of effort required to shape a couple of baguettes is truly nothing, especially when you are rewarded with a gorgeous aroma wafting from your oven, and beautiful loaves that could have been bought in a bakery.  Well worth it.


See?  Yum.

So, I'm going to walk you through the steps, so you can see how simple it is.  The recipe for Pain Ordinaire is from my bread bible, Rustic European Breads from your Bread Machine.  I love this book.  Every recipe, bar one (the foccacia), has been amazing.  The technique for shaping loaves I picked up from River Cottage Bread Handbook, which is a truly invaluable book, even if you decide to wuss out, like me, and let your bread machine do the heavy business.

As for the Pain Ordinaire, this is the stuff that everyone eats in France, aside from baguettes.  It looks like a baguette, it pretty much tastes like a baguette, but technically, it is not a baguette.  That recipe is here, and it's more involved, but darn tasty.  After the machine's done the hard work for you, this recipe seriously takes 5 minutes of your time shaping, about an hour or so to rest, and half an hour to bake.  Yes, that does add up to over 2 hours.  But if you're hanging out at home, it certainly won't get in the way of the rest of your busy day.  So never fear.  And you get to look like a serious badass, throwing down these beautiful, homemade loaves.

Here you go:

Pain Ordinaire in the bread machine - adapted from Rustic European Breads from your Bread Machine

Ingredients
1 1/4 cup warm water
2 1/2 tsp active dry yeast
3 cups unbleached bread flour
1 tsp salt

Useful Tools
dough scraper
water bottle
serrated knife or razor blade

Place water and yeast in bread machine pan, and leave it to bloom for about 5 minutes.  The yeast will soak up the water and begin to look a bit frothy.  Add the flour and salt, and place the pan in the bread machine, on the Dough cycle.  Mine takes an hour and a half, some are shorter.  I don't think it really makes a huge amount of difference.

Turn the dough on to a very lightly floured board, lightly flour your hands so the dough doesn't stick (not too much, you don't want to dry out the dough, or it'll become tough), and shape the dough into a tight ball.  To do this, I fold a "corner" of the dough inward, to the middle, turn, and fold the next corner, turn again, and fold all the way around, so you have a little packet sort of thing going on.  Flip the dough over, so the folds are on the bottom, cup your hands around it, and gently twist dough about a quarter turn, while applying gentle pressure inward and down with your hands, and keeping the dough on the board.  This seals up those folds, and tightens the skin, which will give you that nice crust.  (I should have taken photos of this, but as you can imagine, it's rather awkward to do while covered in flour.)

Cover the dough ball with a large plastic garbage bag, or an overturned bowl, and leave to rest for about 20 minutes or so.  It should look something like this, when you go back to it:


Next, take your dough scraper (you can use a sharp knife, but the dough scraper is super handy, as you'll see in a bit), and cut your dough into two equal parts.


To shape the loaves, gently tap the air out of one risen bit of dough, so it looks like this:


Now, fold the top third of the dough down to the middle, and gently press with your finger tips to seal.


(I don't know why my hands look so oddly red.  Looks like they've been dipped in paint or something.  Or a vat of acid.  Oh well...I do this for you guys, ugly hand photos or no.  Guess I won't be modeling for any lotion ads anytime soon.  So it goes.)

Fold the bottom third up to the middle, just like you did the top.


(Also unsure of why I appear to be flipping the bread off.  Or you people.  It's hard taking a photo one-handed, is all I can say in defense of my apparent and unintentional uncouthness.)

Now, take the top and bottom edges and bring them to the middle, pinching together to seal.


You'll end up with a loaf that looks like this:


Flip that baby over, and gently roll it back and forth a few times, until your dough is a few inches shorter than your baking sheet.  Do the same with the other loaf, and leave to rise on a lightly floured surface, again covered with a plastic garbage bag.  (Many people use a damp tea towel, and you certainly may do that.  I picked up the garbage bag trick in River Cottage Bread Handbook, and it keeps the moisture in the bread better.  And less laundry.  Plus you can re-use the bag several times.)


Once the dough has doubled in size...and this is a variable time, depending on the temperature of your room, the weather, the alignment of the stars, and heaven knows what else...anywhere from half an hour to over an hour usually...it'll look like this:


You'll know it's fully risen when you gently press a fingertip into the dough, and it doesn't immediately spring back, but leaves a small impression.  If you allow your loaves to rise too long, they'll fall, so just reshape and let them rise again, if that happens.  Don't worry, yeast can be pretty forgiving, and will allow you to mess with it for about 3 rises before baking, if you have to.

While you're waiting for the dough to rise...about half an hour in on my time, turn the oven onto 450 deg F.  About ten minutes before baking, place your baking sheet in the oven to preheat.  Get a spot set up for this last bit, because it'll move quickly.  Near the oven, place your water bottle, a serrated knife, dough scraper, and hot pads, then remove the baking sheet from the oven.  Using your dough scraper, carefully run the edge under the loaves to loosen them, then lift one end with the scraper, and one end with your hand, and quickly move the dough to the baking sheet.  Repeat with the other loaf.  Slash each loaf quickly, three or four times with your knife, and spray with water, place in the oven, and spritz the oven walls several times.  Set the timer to 15 minutes, spraying the oven and loaves every 5 minutes.  This spraying crisps the crust.

This sounds rather wordy, but it's incredibly easy, especially once you've done it a few times.  I'd love to have photos to show you, but I do not have that many hands, alright, people?

When the timer goes off, rotate the pan back to front, and continue baking for another 15 minutes, then allow to cool on a wire rack for at least 20 minutes.


If you can wait that long.

Happy Bread Baking!


Tuesday, February 28, 2012

It Comes Together

You know those days...weeks...months, even...where it feels as if, no matter how much you accomplish in a day's work, you never quite manage to get it all done?  Do you have those too?  About a year ago, I noticed myself saying things like:  "It'll all calm down after _______________(fill in the blank with any of the following:  the holidays, the end of school, summer break, birthday parties, the flu, renovating the house, selling the house, moving, and so forth)."  This naive, wistful thinking went on for some time until one fateful day awhile back, when I had a small sort of epiphany.  Not necessarily the leaves-you-enlightened-and-at-peace-with-the-world sort epiphany, alas.  More of your garden variety, "Ahhhh.  I see.  Well that sort of sucks," epiphany.  The realization being that, guess what?  This, my friends, is what it means to be a Grown-Up.  Capital G.  Life, in all its awesome variety, in its astounding array of choices on how to live our lives, in its long-sought-after independence...life. is. busy.  Freaking hugely busy.

And so it goes.  You all know, you're living it too.  So when I don't happen to pop on here for a wee bit, from time to time, I'm pretty sure you'll forgive me.  Without me even needing to go into the mundane details of why I can't get my shit together sometimes.  And I thank you for that.

So.  When, in the midst of the pandemonium that is Grown-Up Life, a teeny, tiny, wee thing comes together smoothly, I feel rather pleased.  Nay, I feel bloody stoked.  So stoked, in fact, that I must share it with you.  And fortunately, this coming-together moment happens to be concerning some food.  (Hurrah!)

Since we're on the verge of a move, I'm making an effort to deplete some of my lingering food stores, at least the refrigerated ones.  This weekend, I combed through the jars on the door of the fridge (aren't there always so many nearly-but-not-quite-empty jars in there?!), and through some pantry shelves, and came upon some serious goods.  Well, actually, some quite ordinary goods, but, as luck would have it, it all came together.  And how.

My stash?  Not even a handful of green olives, half a red pepper, and a paltry amount of sun-dried tomatoes.  Not so exciting, you think?  Oh, but just put on these rose-colored lenses of mine, and you'll see:  It Comes Together.


Roasted Red Pepper Tapenade - makes a wee bit

Ingredients*
1 large red bell pepper
1/3 cup pitted green olives (mine were the ordinary, pimento-stuffed sort)
1/4 (ish) cup sun-dried tomatoes**
1 small clove garlic, minced
dash red wine vinegar
small glug olive oil
pinch red pepper flakes

*I've doubled the ingredient amounts that I had in my house at the time, to give you a larger quantity of tapenade.  You really can't mess this recipe up, I dare say, so don't worry if you don't have everything exact.*

**My sun-dried tomatoes were the dry sort, but if you have the oil-soaked ones, that's fine too, just omit the olive oil in the recipe.**

Slice the red pepper in half, lengthwise, and remove the stem and seeds.  Place on a baking sheet, cut side down, and put under the broiler until blackened.  This took about 10 minutes in my oven.  Just keep checking every few minutes.  Remove peppers, and place in a bowl, cover with plastic, and leave for about 20 minutes (or until you remember to come back to it).  Peel the skin from the peppers and discard.

Toss all the ingredients into the food processor, and pulse a few times, until of a uniform size, but still slightly chunky.  Let the tapenade rest for half an hour, if you can swing it, then serve, atop warm bread, like this one, or this one.  Preferably with a glass of wine.  Or two.


I love with it comes together.  Don't you?

Have a lovely evening.

Wednesday, February 22, 2012

Pancake Tuesday

As usual, my timing is...well, less than impeccable.  Yesterday afternoon, I had word that it was Shrove Tuesday...which we celebrate, UK-style, as Pancake Tuesday.  Good planning, as ever, on my part, of course.  You know the saying "A day late, and a dollar short?"  My mom loved that one, when we were kids.  I wasn't quite a day late for the pancake delivery, but this post?  Definitely late, alas.  Oh well, so it goes.

The history behind Pancake Tuesday is that you get to gorge on what's left of the food stores that get restricted during Lent...eggs, flour, sugar, butter, and milk, being the applicable foods in this case.  Most of the folks we know who dig in and fill their bellies on the pancake feast don't actually do it for religious reasons, but it's such an ingrained tradition, and a pretty sweet deal to stuff yourself full of pancakes and delicious fillings...even if you're not going to be fasting for the foreseeable future.

Pancakes are to us Americans, crepes.  Those tasty delicate little treats, that are perfect stuffed with any number of fillings, savory or sweet.  I generally favor a savory crepe, over a sweet one, especially for dinner.  Last year, I made a mushroom and asparagus filling.  And while I actually had mushrooms and asparagus in my fridge last night, I quite simply couldn't be asked with it.  Not when we arrived home at close to six, and had to whip up the crepe batter, let it rest, and then get started on filling prep.  Nope.  I phoned it in a bit, and went for sweet.

I have to confess to buying out of season strawberries for these.  I don't know what possessed me, and truth be told, they weren't very tasty.  Even after being sprinkled with some sugar in a thwarted attempt to coax some sweetness from them.  If you're making these outside of strawberry season, I'd recommend doing it with a preserve, or perhaps a compote, instead.

Along with the strawberries, I scrounged a bit of this and that from the fridge and spice shelf, and came up with a cream cheese-based spread, with a dash of cinnamon, and a squeeze of Meyer lemon, and it was darn tasty.  Lovely, actually.  Reminiscent of a blintz filling, but without the egg, because I wasn't bothering to cook it.

The Mister generally does the crepe batter, and makes it sans recipe, throwing it all together in the blender.  I used an Alton Brown recipe I found on foodnetwork.com.  Which I tweaked, of course.  Not that it needed tweaking necessarily, but it called for 3/4 cup of milk, and 1/2 a cup of water, and since we usually just do milk, I went with 1 1/4 cups of milk.  And it was delicious.  

Here you go:


Crepes with Strawberries and Sweetened Cream Cheese

Ingredients

for the Crepe Batter
2 eggs
1 1/4 cups milk
1 cup flour
3 Tbs melted butter
1/2 tsp pure vanilla extract
1 tsp sugar
pinch salt

Give all the ingredients a whir in the blender until smooth, then leave it to rest in the fridge for at least an hour.  It will keep up to 2 days.  The recipe is easily doubled to make more crepes, should you feel particularly inclined to gorge.

To cook:  Heat a nonstick skillet over medium high heat, and brush a small amount of butter around the pan, just enough to barely coat the surface.  You will need to keep an eye on the heat as you go, and possibly adjust.  To be sure the pan is ready for the first crepe, flick a bit of water in the pan, and if it dances immediately, you're good to go.

Pour out about 1/4 cup (ish) into the pan, and immediately swirl the batter around to get your pancake as thin as possible.  Cook for 30 to 45 seconds, then loosen with a spatula, and flip.  Cook the second side for another 30 seconds.

You can cook these ahead of time, if you all want to sit and eat together, and keep them in a very low-heated oven, around 200 deg F.  If you're the civilized, organized type.  If you're like my family, the Mister will be at the stove, the Kiddos at the table, and I will run back and forth, filling and refilling, and taking bites in between.  What can I say?  It was getting late, and it works.

for the cream cheese filling
2 oz, 1/4 package, cream cheese (the kind in a brick) - at room temp
2 or 3 Tbs plain Greek-style yogurt
1 tsp Meyer lemon juice
1/2 tsp ground cinnamon
2 tsp sugar

Thoroughly mix all ingredients together until smooth.

To serve:
Spread a bit of the cream cheese mixture on one quarter of the crepe, and top with strawberries, or preserves.


Fold the crepe in half...


Then in half again, to make a triangular packet.  Dust with powdered sugar, and serve immediately.


Happy Belated Pancake Tuesday.

I just thought of another good saying, like my mom's classic above.  When the Mister arrives at the beach, board tucked under arm, and sees the expected swell is flat...someone will invariably say:  "Shoulda been here yesterday, mate."  (Or dude, depending on your continent.)

You should have been here yesterday.  It was some good pancake eating, my friends.