"Things won are done,
Joy's Soul lies in the Doing."
- William Shakespeare

Tuesday, May 8, 2012

Cheap & Cheerful

Do you know about this?


Fred Meyer is now stocking a selection of sea salts, at their olive bar.  The above container of sel gris, (half of which I've used already), cost me a whopping $2.70.  For roughly a third of a cup.  (The weight got ripped off the sticker, so I've no idea the exact amount.)  How cheap, and how very cheerful, is that?

Among other varieties, I noticed a Hawaiian Pink, a Hawaiian Black, fleur de sel, and of course the sel gris.  I don't know about you folks, but that makes me all sorts of stoked.


Sel gris is grey salt, aka Celtic sea salt, and is typically harvested in France.  It's a lovely, rather moist salt, with a much more complex flavor than regular table salt.  And it's usually a hell of a lot more expensive.  (Which does beg the question:  How is Freddie's able to sell it so cheaply?  Hm.)  I love sprinkling this stuff over a buttered baguette, perhaps with some thinly sliced radishes.  Or over some tasty homemade ricotta, atop a slice of bread.  Oh, heavenly.

Using just a bit of what tends to be thought of as a luxury food really makes a difference in a meal, don't you think?  Whether it's a sprinkle of a gourmet salt, a grating of fine cheese, or a glass of good wine...it makes the meal special.  And why not?  Every meal can be special, if we just take a wee bit of time to make it so.  So much the better when we find a good deal, that doesn't break the bank.

And I do love salt.

Have a well-seasoned day, my friends.


Thursday, May 3, 2012

Whey-ing In


 This post feels a little backward to me, because ideally, it should follow another one.  However, that supposedly preceding post is not yet ready to be shared, and I am just a wee bit stoked on what went down around here for dinner last night.  Who needs chronological order anyway?

To backtrack, seeing as how we're bending the whole time-continuum thing right now, I learned how to make homemade mozzarella last weekend.  (!)  But, I'm feeling like another go, or even two, would be smart, before I post the how-to.  Never you fear, though, I will indeed be making mozzarella again soon, and often, so the recipe will appear in the not so distant future.

The interesting thing with making mozzarella is that you're left with a rather huge amount of whey afterward.  I asked my culinary guru friend, M, what we should do with the stuff, as it shamed a shame to throw it out.  She sent me a link from The Prairie Homestead, with sixteen ways to use it up.  (Sixteen!)  Some are downright wild (hair rinse?), and some are freaking awesome...

Like making ricotta.  


And using it in bread.  


Waste not, want not, right?

So, that's what I got up to yesterday, and it was pretty fun.  And pretty tasty.  I will say that it's a bit of effort, but to me, the end result made it completely worthwhile.  Besides, how often can you say that you've not only made your own cheese, but that you've used the "waste" to make even more cheese, and bread?  On top of all that goodness, it turns out, whey is really good for you, packed full of enzymes and protein and all sorts of lovelies.  You can even water it down and fertilize your garden with it, by the way.  It's like magic, this stuff.

Here's the lowdown on the bread, and it's easy-peasy.  I substituted the whey left over from making the ricotta (recipe follows), for the water in Pain Ordinaire.  So, this whey had technically been through cheese making not once, with the mozzarella, but twice.  Since the ricotta is made from the leftover albumin protein in whey, my understanding is that this second-time-around whey would be kind of drained of protein.  (Don't quote me on this.)  I'm guessing then, that substituting the initial (mozzarella batch) whey, would result in a higher protein bread, and I'm definitely going to try that next time.  This though, worked perfectly in the loaves.  The dough was a dream to work with, light and pillowy, and the end result was an incredibly soft textured crumb, but still with the lovely crisp crust.  If you're just crazy enough to have some whey around your kitchen, you should definitely throw it into your next batch of bread.  I'm telling you.

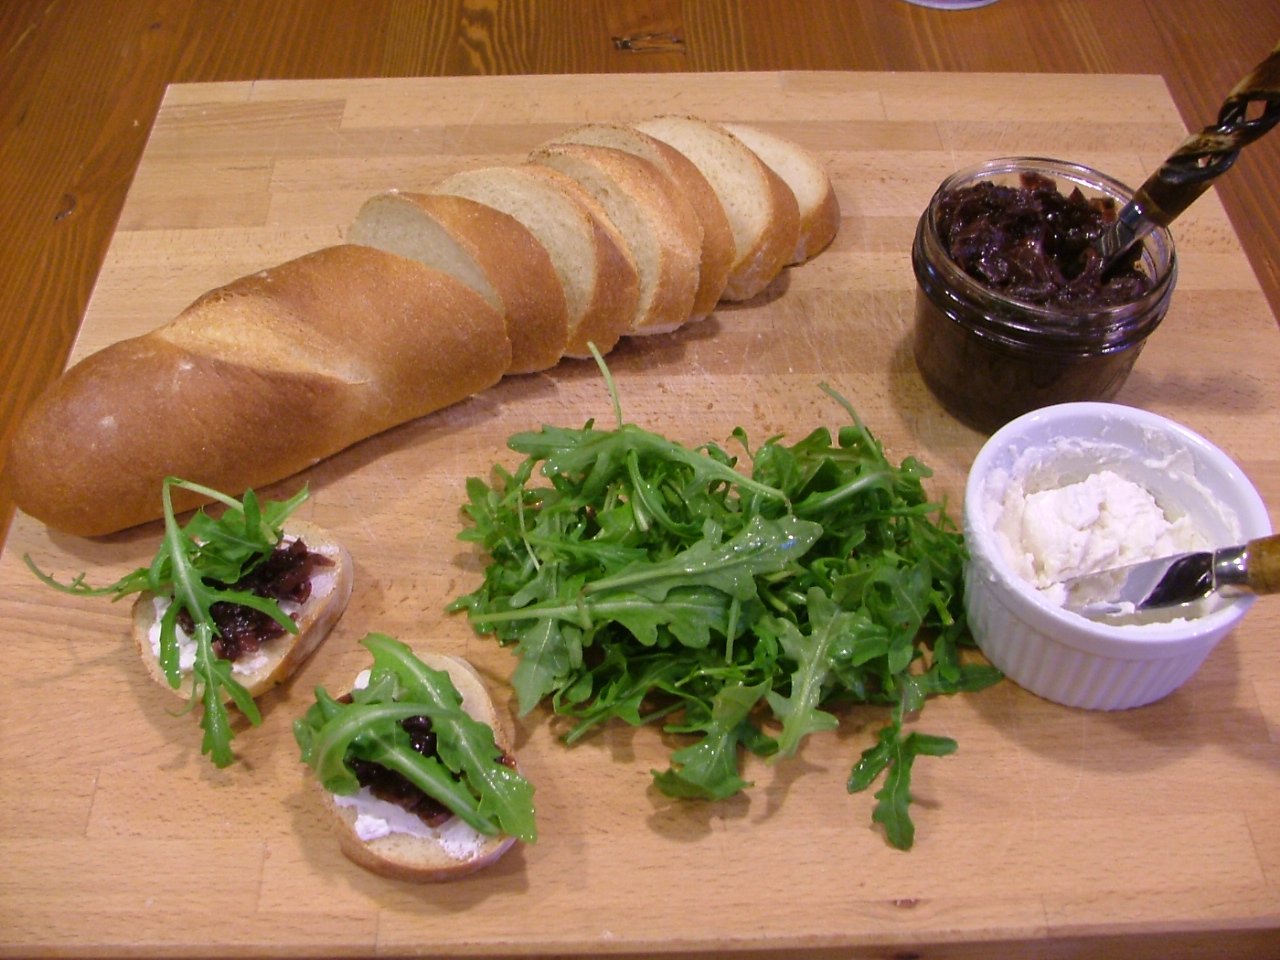
That brings us to the ricotta.  I've made it once before, but it was somewhat eh.  Not bad, just nothing to get worked up about.  As I learned in this recipe from Fias Co Farm, ricotta is traditionally made with leftover whey, not milk, as I'd done in the past.  Hence, it's name:  ricotta.  Twice cooked.  I had about half a gallon of whey, which only made about a third of a cup of ricotta.  So, fair warning.  It is, in my humble opinion, about quality here though, not quantity.  The cheese was gorgeously creamy, and held its own perfectly spread on bread, with a bit of sel gris sprinkled over it.


My initial instinct was to pair the ricotta with a beautiful caramelized onion jam that M brought me, and top it with baby arugula.  It was delicious, and pretty, but the jam rather overpowered the ricotta, so I went with just a bit of ricotta and salt after that.

Ricotta - adapted from Fias Co Farm

*Note*  You don't need exact amounts here, just use whatever you've got, but know that my half gallon only made about 1/3 cup.

Ingredients
Whey, leftover from making mozzarella (using rennet, rather than an acid)
Salt

Equipment
Two large pots, appropriately sized for the amount of whey you're using
 - one for cooking the whey in
 - one to set the sieve over, to drain the ricotta
a large, fine-mesh sieve
a thermometer that reads at least up to 200 deg F (I just used my meat thermometer)
very fine cheesecloth, called butter muslin, or a light tea towel (I used the towel) to line the sieve

Set up one of the pots in the sink, with the sieve over it, and cloth lining the sieve, for draining.

Over medium low heat, bring your way slowly up to 200 deg F, checking the temperature fairly regularly, stirring from time to time.  If you're whey begins to stick to the bottom of the pan, don't scrape it up, just leave it, and gently stir the liquid.  It took about half an hour (give or take) for me to get to 200 deg, but your time will depend on how much whey you're using.  At about 180 deg, I noticed the whey thickening very slightly, and by the time it reached 200 deg, there were lovely, cloud-like clumps floating at the top.  (The ricotta)  At this point, carefully pour the hot liquid into the cloth-lined sieve, and let the majority of it drain through.  Then, tie up the four corners of the cloth, and leave it to drain thoroughly for a couple of hours.  Scrape the ricotta into a dish, and salt to taste.  You are now the possessor of one gorgeous bit of cheese, which will keep for a couple of weeks in the fridge.


5/17/12:  Correction:  I originally posted here that I read that whey will keep, refrigerated for six months...not true!  I just pulled out some whey to make another round of ricotta, which was only a week and a half old, and it was absolutely rank.  Not sure what the story is there, but I guess my best advice is to use that mozzarella whey up within a couple of days, to make your ricotta.  Or fertilize the garden with it!

Enjoy!

Tuesday, May 1, 2012

A Thousand Words

So, I had a sort of epiphany this morning.  I've been debating two recipes that I'm rather excited about, and have been having a bit of trouble deciding which to share.  One is ready.  One, I have to admit, needs some more work.  And the photos I have of this recipe are utter rubbish.  Those utterly crap photos led me down a little meandering path of thought.  It turns out, this is a good thing, because I was able to see a few things about myself, and this blog, a little more clearly.  You see, I've been privately berating myself about my measly posting of late.  A mere one post a week.  For a while now.  I have all sorts of excuses for my slackness, of course.  Busy...lackluster photos...uninspired writing...blah, blah, blah.  And I realized, with a figurative slap to the forehead, that those less than perfect photos are really holding me back from saying what I want to say.  Here's the thing:  I am not a photographer.  (I know, you're shocked.)  Sure, I enjoy looking at other blogs with beautiful pictures of food.  You know the photos I'm talking about:  an ordinary hunk of cheese, a simple wedge of cabbage, a humble slice of bread that is so picture-perfect that you're drooling jealously over not only the food itself, but the talent that went into taking that lovely shot.  And thinking about all this, I was able to see something kind of important.  The reason I began this blog was not to show off my (imagined) photography skills, but to write about the things I love.  They say a picture is worth a thousand words, but for me, it's the words themselves that light me up.  The words, and the food, of course.

So, my friends, having done my bit of confession this morning, I'm hopeful that I will no longer let my sad high school photography class-level shots stop me from writing.  (I took that class because there was a cute boy in there, and many of my photos were ridiculous shots of my feet in different locations...oh dear, it is confession time, isn't it?)  I'm hopeful that my rather middling talent in this arena will no longer stand in the way of the words.  Because I do love words.  And food.

Saying that, I actually am fairly happy with the shots I took of this recipe...


See?  That's not entirely terrible.
Moroccan Spiced Turkey Patties.  I found the recipe via Splendid Table's weekly newsletter, and it originally hails from James Villas' From the Ground Up.  And it is something special, I must say.

I altered the recipe somewhat, substituting golden raisins (sultanas) for the black ones, because I'm funny about raisins in my food.  I don't know what it is exactly, they just don't do it for me.  It's mainly a texture thing, I believe, and so this led me to also chop up the sultanas, so that there was a small burst of sweetness, rather than the offending chewy pop you sometimes get with cooked dried fruit.  I also made the patties falafel-style, into little balls, and grilled them, rather than the pan-fried patties suggested in the recipe.  You see, I had a Mister wanting to try out the new barbecue/smoker, so it worked for us.  That's the thing about recipes, isn't it?  You find something that interests you, and adapt it to suit your fancy.

And these definitely suited my fancy.  Super easy, super quick, a dish that would be a fantastic crowd-pleaser, especially if you want a little something unusual to replace the standard burger-as-barbecue-fare.

Go to it, people.


Moroccan Spiced Turkey Patties with Herbed Yogurt Sauce - adapted from From the Ground Up

Ingredients

Patties
1 1/2 lbs ground turkey, preferably dark meat, or a mix of light and dark
1/4 cup golden raisins (sultanas)
1 Tbs tomato paste
1/8 tsp ground cinnamon
1/8 tsp ground ginger
sea salt and freshly ground black pepper, to taste

Herbed Yogurt Sauce
1/2 cup plain yogurt
2 tsp fresh lemon juice
1/4 tsp ground cumin
1/8 tsp ground coriander
1/8 tsp cayenne
small bunch of chopped herbs:  mint, cilantro, green onions (green parts only)
sea salt and freshly ground black pepper, to taste

For the Patties:
Thoroughly combine all ingredients in a large bowl, mixing gently with your hands to combine.  Don't overmix, or the meat will become tough.  Form the meat mixture into roughly two inch balls, and grill (or fry) until the inner temperature reaches 165 deg F.  This took us about 10 to 12 minutes over charcoal, but may differ for you, depending on your cooking method.

For the Herbed Yogurt Sauce:
Combine all ingredients, and check for seasoning.  You can easily vary the sauce by adding fewer herbs, more cayenne...it's up to you.

Serve the patties on warmed flatbreads, or pita, with some shredded lettuce, and a few vegetables.  I sliced some yellow pepper, cucumber, and pickled beetroot.  Spoon over the sauce, and enjoy.


I may not take the photos that are worth a thousand words, dear people, but I can certainly yammer on that long.

Have a lovely day!


Monday, April 23, 2012

All Sorts of Good

This past weekend has been a huge treat.  Summer weather, which is uncommon around here in April, had us loving on some outside time, getting up to all sorts of good things, with good friends.

There may have been a little rope swinging action.


There may have been some archery.


...with cute baby bumps.

As you do.

(Actually, it's not something we usually do, but it was indeed fun.)

And best of all, there was pasta making, my friends.


Which, like the archery, was a first for me.  And it was all sorts of good.

You need some extra hands for this one, preferably those of some very dear friends, like our M & J, (who brought the pasta maker, as well as the bow and arrows) perhaps a couple of Kiddos to help with cranking the dough through the rollers, and a Mister, to snap photos of the whole thing.

J found the recipe here on cook-italian.com, and it worked amazingly well.  Not that I have much, ahem, any, experience with making fresh pasta.  But M is Italian, grew up eating fresh pasta, and he wholeheartedly approved, so there you go.  You can trust him.  Being the slacker that I am, and lacking the finesse (as well as confidence) in my dough working abilities, we cheated, and adapted the recipe for the pasta setting on my bread machine.  I must say, major pat on the back for that clever move.  (M's the one who told me about the pasta setting, too.  Very hip to it, that guy.)  So, I'm sharing instructions for how we made our pasta, if you want to roll lazily along, like we do.  If you're a little more hardcore, and prefer to do it by hand, just visit the site for complete instructions.

Also, the recipe said the amount fed only 1 to 2 people, so we tripled it, and Mamma Mia!  Did we ever have enough pasta for four adults, and two Kiddos, with leftovers.  I'm giving you the doubled amount of the original, to feed six easily.

Here you go:

Fresh Semolina Egg Pasta - adapted from cook-italian.com
 - serves six

Ingredients
4 large eggs, beaten
2 cups semolina flour (Bob's Red Mill makes this, and you can get in in bulk at Fred Meyer too)
1 cup all purpose flour
4 Tbs olive oil
4 or 5 Tbs water
1 tsp fine sea salt (plus more for boiling pasta)

In your bread machine pan, place the beaten eggs, olive oil, and 4 tablespoons water, followed by salt, and the flours.  Set the machine to the pasta setting, if you have it (or use the dough setting, and take it out after about 10 to 15 minutes, once thoroughly kneaded).  After about 5 minutes, peek in and make sure the dough is combining well, if it appears dry, add another tablespoon or two of water.  If it looks too wet, you can flour your board and knead in extra flour soon.  The dough will appear much stiffer than bread dough.  This had me concerned, but M assured me it was right.  And it was.

Once the pasta cycle is complete, and the dough is nice and smooth, place it in a covered bowl, or plastic bag, and refrigerate for 20 minutes, up to overnight, to rest.

Here's the fun part.  Divide your dough into four to six pieces, keep the ones you're not working with covered, in the fridge.  Roll out a piece to a thickness that will fit into the pasta machine, approximately 1/4 inch thick.  Starting on the largest setting ("1", in our case), roll it through the machine. 


Keep at it, until it's your desired thickness.  (We felt good with "5")


Next, you get to decide what type of pasta you're craving.  We went with fettucini.  I'm fantasizing about some serious lasagna next time.  And spaghetti.  And ravioli.  Mamma mia!

Hang the pasta to dry on a pasta rack, if you have one.  If you run out of room, because of copious quantities of pasta (which is never a bad thing), you can use hangers, like we did.  


How lovely is that?  Let the pasta dry for about 20 minutes or so, while putting a very large pot of heavily salted water on to boil.  Drop the pasta in carefully, and cook for 2 to 3 minutes, until al dente, with a bit of a bite to it.  You may prefer to do this in two batches, because it's rather tricky getting that much pasta into the water quickly, and not dropping the temperature too low.  If you do this, use tongs or one of those groovy pasta scoop things, to fish out the first batch, then bring the water back to a rolling boil for the second.

Drain the pasta, being sure to save a cup or so of the water.  Toss the pasta with some of your preferred sauce, a bit of pasta water, a glug of olive oil...and serve it up, family style, with some good parmiggiano.


Okay.  Just one more:  
Mamma Mia...what a good day.


Monday, April 16, 2012

Cheap & Cheerful

This Cheap & Cheerful, my friends, is one to stock in your pantry at all times.  Especially if you have kids.  Even if you don't have kids, come to think of it.


Cheap and cheerful in its truest form.  El Pato salsa is making a rather regular appearance around these parts lately.  The wee 7 3/4 oz cans run about $1, but I often see them on sale for 59¢, and of course, I grab several.  There's a very slight amount of heat in the red can, which the Kiddos love, and gobble up with their "specialty" (make-it-yourself, school-night quesadillas).  El Pato makes two other versions, one in a yellow can, one in green.  For some odd reason, the yellow's the spiciest, and I can't tell the difference between green and red, but whatever.  It's tasty and quick.  A smooth salsa, rather than the usual fresh, chunky style we tend to see more around the Pacific Northwest.  Perfect for those nights when dinner's delayed, and a little nibble of chips and salsa is necessary to appease the hunger pangs.  (And to postpone the inevitable "When's dinner?!" whining).  Or for when you're trying very hard to stick to eating in season, and tomatoes are a long way off from being locally available.  However you slice it, this is a no-brainer. 


Go grab some, and enjoy!

Have a great day!

Monday, April 9, 2012

Phoning it in

Last week was Spring Break for the Kiddos.  Unfortunately, instead of the planned gatherings with friends and trip to the zoo, The Boy and I managed to pick up some mystery bug, which knocked us out of commission for the last several days.  On the good side, we did get to spend some serious quality time snuggled up in bed, watching movies, reading books, knitting, and napping.  (Napping?  I think the last time I engaged in that activity was in the bygone Before-Kids Era.)  So, when Easter rolled around yesterday, and we found ourselves still not quite up to scratch, health-wise, we had to kind of phone it in, as far as festivities and feasts go.

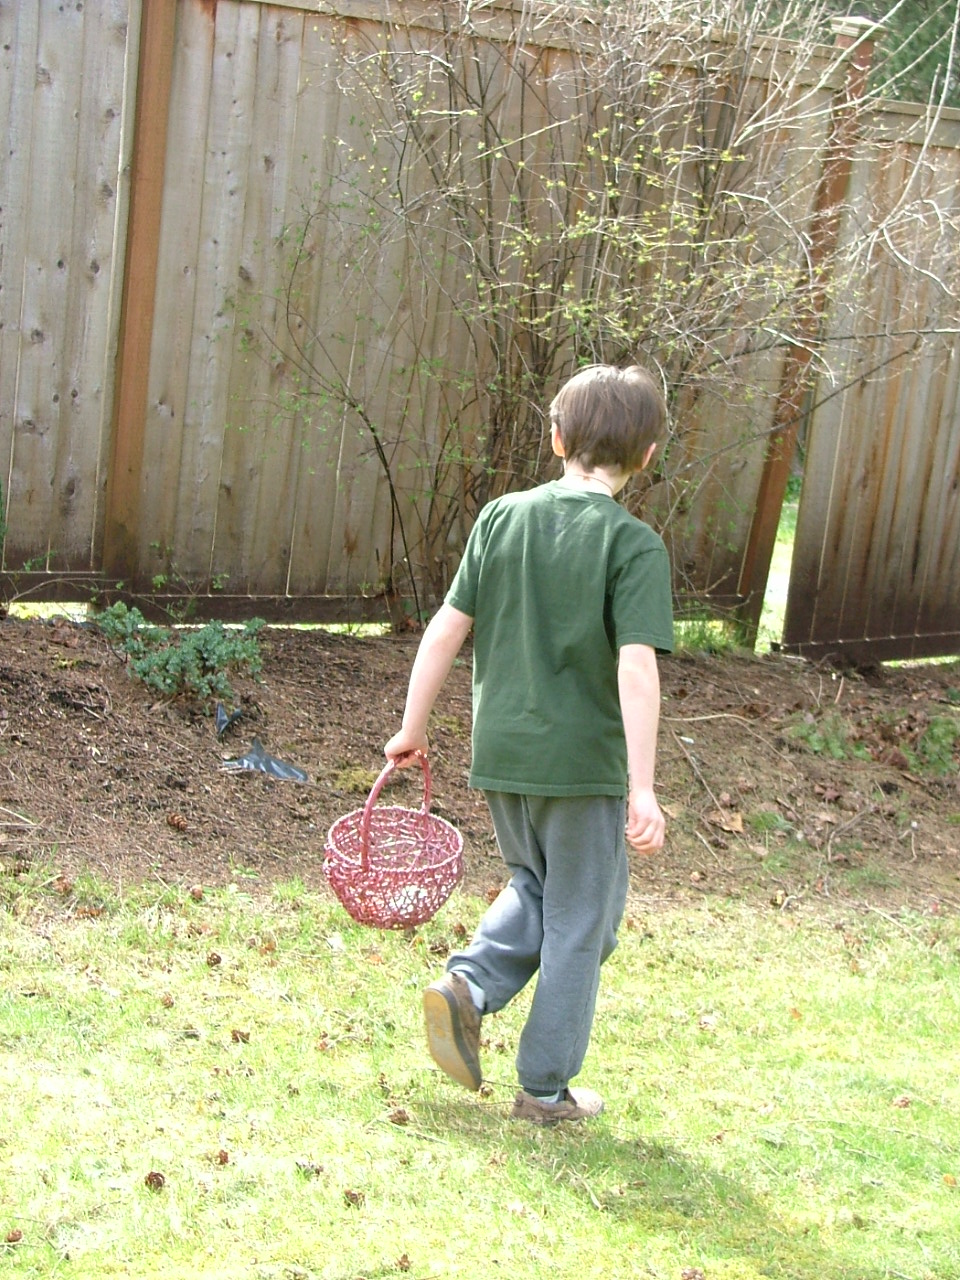
We did manage a tame egg hunt, while gale-force winds threatened to sweep the Kiddos away...


I did manage to knock up a nice little aioli (Un petit aioli rather than Le grand aioli?) in the afternoon...complete with sweet potato fries.  Which I suppose could sound odd, but was very tasty.


And best of all, in my phoning it in frenzy, I did manage to score on finding a Martha Stewart recipe that was so incredibly simple to prepare, and so delicious to eat, that I must share it with you.  With only three, count them, three!, main ingredients, the Asparagus and Gruyere Tart pretty much made my day. 


 A simple store-bought sheet of puff pastry, topped with some grated Gruyére and fresh asparagus.  The asparagus is spot-on for ripeness right now, and it roasts up atop the tart so nicely.  I sprinkled a little coarse pink Hawaiian salt (gifted to me by G), over the asparagus, and oh my!  This one, my dears, will completely fool your people...they'll have no idea you phoned it in.  And if they do, they won't care, it's so tasty.

Here you go:

Asparagus and Gruyére Tart - adapted from marthastewart.com

Ingredients
One sheet of frozen puff pastry, thawed
1 cup shredded gruyére*
Approx 1 1/2 lbs asparagus
olive oil, for brushing
coarse pink salt, sel gris, or kosher salt, to taste
freshly ground pepper, to taste

Preheat oven to 400 deg F.

On a lightly floured work surface, roll the thawed sheet of puff pastry out to an approximate 10" by 16" rectangle, then transfer to a baking sheet.  Using a sharp paring knife, lightly score 1" from the edge to mark a rectangle, then prick with a fork inside the rectangle, every 1/2".  Bake in oven for 15 minutes, until lightly golden.

Remove pastry from oven.  Trim your asparagus to fit crosswise within the inner rectangle (see above photo).  Cover pastry with cheese, then lay the asparagus over the top, and brush lightly with olive oil, and season with salt and pepper.  Bake for another 20-25 minutes, until the asparagus is tender.  Serve immediately.


Enjoy!

Monday, April 2, 2012

Making the Most (of Beets)

I usually have the very best of intentions when it comes to not being wasteful of food.  I sometimes find it tricky, though, to use every last bit of certain foods, even though they taste lovely.  Beet greens are often my downfall, as far as wastefulness goes, anyway.  I adore beets.  Everything about them:  their vibrant, almost obnoxious color; their sweet, yet earthy taste; how they adapt to so many preparations...steamed, boiled, roasted (especially roasted!), pickled, juiced...And yet those greens often elude me, and I find myself guiltily snipping them off, wilted from not being used immediately, and chucking them. 

I detest wasting food.

Not so last night, though, my friends.  I made the most of those beets, greens and all.  I'd been picking through Tender (again), and lit upon one of Slater's ever-so-helpful recommendations on an accompaniment to beets.  Get this:  gherkins.  (That's a cornichon to the French, and pickled, for us Americans.)  Beets and pickles, you say?  Hmm.  I mulled it over, and found it made sense.  After all, beets and dill are a perfect pairing, and how delicious are pickled beets?  So, I decide to make a salad out of my beet greens, which were young, tender, and rather sprightly (thus, I absolutely could not waste them, yet again), some roasted beetroot, and some cornichons.  A little pomegranate and shallot vinaigrette...and away we go.

Here you have it.  A salad that's just crazy enough to work:


A Salad of Roasted Beets, Wilted Beet Greens, and Cornichons - serves 4 as a side

Ingredients
1 bunch (3 or 4 small to medium) beets, with tender, fresh greens still attached
3/4 cup cornichons, sliced into bite-sized pieces
balsamic vinegar
olive oil
smoked flaky sea salt (regular flake sea salt will do fine)
freshly ground black pepper

Vinaigrette
2 Tbs pomegranate red wine vinegar (or balsamic)
1 tsp minced shallots
1/2 tsp dijon mustard
1 tsp packed brown sugar
4 - 6 Tbs extra virgin olive oil (I used about 4, for a tangier vinaigrette)
smoked sea salt (or regular)
freshly ground black pepper

To prepare the beets:

Preheat the oven to 425deg F.

Snip the beet greens off, about an inch above the root.  Thoroughly wash the beetroot, scrubbing away any mud or dirt.  Check in the stems particularly, clumps of sandy mud often hide in there.  Rinse the greens (separately) in a sink partly filled with cold water, leaving to soak for a couple of minutes, to loosen any grit.  Drain, then wrap in a paper towel, and refrigerate until ready to assemble the salad.

Quarter or halve the beets, depending on size, and place on a large square of aluminum foil.  Drizzle with a bit of olive oil, some balsamic vinegar, and season with smoked sea salt and pepper.  Wrap the packet tightly, place atop a baking sheet, and roast for 45 minutes to an hour, until beets are fork-tender.

To prepare the vinaigrette:

Once the beets go into the oven, whisk together the vinegar, dijon, shallots, brown sugar, salt and pepper, until thoroughly combined, then drizzle in the olive oil, and whisk until emulsified, about a minute or so.  Leave at room temperature to let the flavors mingle until you dress the salad.

To assemble the salad:

*Note*  My beet greens were rather small, and quite tender, thus, needing no more than a little wilt from the hot-from-the-oven beetroot.  I'd advise using similarly young greens, or if that is impossible, either substitute another slightly bitter green (such as arugula, or mustard greens), or give older beet greens a go quick go around in a hot pan, to wilt them down a bit, before tossing the salad together.

In a large serving dish, toss the greens with small amount of vinaigrette, then the (still hot) beetroot.  Dress with a bit more vinaigrette, then scatter the cornichons over the salad.  Serve immediately.


You really could play with this salad, and change it up, by altering the dressing ingredients, or adding a tangy goats cheese to contrast with the sweetness of the beets, and the tart cornichons.  Have fun with your food, and make the most of it!